Week Eight

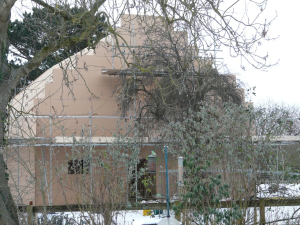
Cladding on the side of the house

Cladding on the side of the house

There was a day or two when the house briefly looked like something from the set of The Magnificent Seven—the pieces of cladding sticking out stepwise at the gable ends.  As more is put into place it reverts to a brown cardboard box.  We were reminded of converting the boxes from TVs or other large equipment into playhouses for the children.

The snow came at the weekend—as forecast.  Rather more snow than expected—nearer 15cm than 10, I’d say, such that the car was tending to “snow-plough” down the drive.  Any deeper and  we would not have been able to get out.

Following this, the weather has continued cold but dry.  Despite this work has continued and we do admire the builders for pushing on in these conditions.


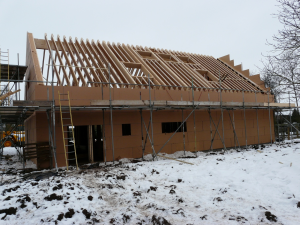
Cladding and rafters

Cladding and rafters

You can now begin to see where the upstairs roof lights are to go—the apertures are clear, now that the jack rafters have been put in place.  The lights are quite large, with 5 on the north roof, giving light to the two upstairs bathrooms and 3 over the stairwell and landing, all triple glazed.  The calculations show that, to have them on the south roof, the house would risk getting too hot.  There’s one, in the upstairs study, that does face south and we are to have an external blind to provide shade on summer days to stop the room overheating.  To meet safety escape requirements, this is top hung—so that you can climb out on to the roof in case of fire (the others are centre hung) but, presumably because of the weight, this one is only double glazed.

Posted in Cladding, Roof | Comments Off on Week Eight

Week Seven

The second storey, under roof goes up. Better weather this week, with the last few days very cold but sunny and clear.  The quagmire created by the forklift is frozen hard which makes moving around the site much easier and on the Thursday and Friday the wind drops, making (almost) ideal working conditions.

Ridge beam being placed

Ridge beam being placed

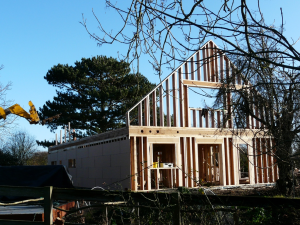
The huge glulam ridge beam is lifted in, in three sections.  Many rafters follow quickly, so that by the end of the week the shape of the house is is becoming clear.  Curiously, with the beam in place, the size of the house is contained.  Much of the groung floor has the external, air-tight  cladding in place now and this view the spaces for the large south facing windows.

Rafters

The rafters are now in place

Posted in Roof | Comments Off on Week Seven

Week Six

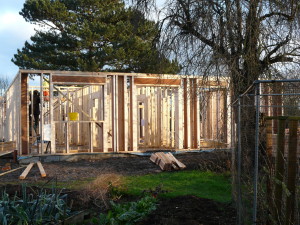
They have had a really rotten week, last week, with the second half being really cold and wet—quite miserable.  This photo, taken in the middle of this week shows how  well they’ve got on and the weather’s better at the moment.

Ground floor under construction

Ground floor under construction

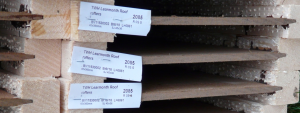
It’s bad for one’s ego—every piece of wood has literally got my name on it:  TWH Learmonth – and code numbers. The TWH is for Touchwood Homes, the main builder and the originator of this particular building technique.

Labels on the wood

Labels on the wood

The I-beams are assembled from finger-jointed studs, about 2” by 2” (OK, 50 by 50mm) joined with a web that looks like hardboard or OSB (Oriented Strand board), but isn’t.  It’s made, I’m told, from wood fibres compressed under such force that the cellulose and lignin in the wood fibres glue themselves together.  This means that there is no glue and therefore no out-gassing of the glue materials such as formaldehyde.  If you expand the picture you may be able to see that the dimensions given are 45 x 360mm for these rafters.

The gable ends go up on Thursday—the house looks enormous.

The Gable Ends

The Gable Ends

Posted in Ground Floor, Precut wood | Comments Off on Week Six

Week Five

Two enormous articulated lorries are scheduled to arrive.  To avoid conflict with school arrival time—the Primary School is just across the Green and the congestion can approach city centre proportions—the artics have been asked to arrive at 9.30 am and 12.30 pm.  Looking out at 7.30 we find that there’s a large foreign lorry parked up just outside the school.  Sigh.  After  consultation, we suggest to the driver that he should park in a lay-by on the A120 until after school’s started—which he does willingly, and we lead him to it.  On his return, he finds that the 12.30 lorry has not only just arrived but backed in before him!  It takes some 2 hours to unload the “second” artic, carefully placing each package of pre-cut timbers in piles around the site, first—and then it’s the first lorry’s turn.

View from the west - basic ground floor structure

Things now really begin to happen.  By the end of the second day, all the external wall studs are in place.


Posted in Foundations | Comments Off on Week Five

Week Three and Four

Olof, from Sweden, had arrived to oversee insulation and the pouring and levelling of the slab—apparently this method of construction is far more common there than here.  Ready for pouring the slab.  The concrete pump returns.

Again a stream of concrete bowsers arrive (though not quite as readily this time, so there’s a certain amount of standing around).  Using a length of drain pipe, blocked off with some polystyrene at each end, and attached to a broom handle, the surface is smoothed and levelled.  These laser level gauges are magic.  Later, when the concrete has set and after some rain, I find that the “worst” puddle is less than 5mm deep.

Christmas. 

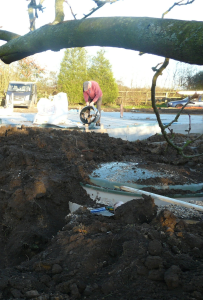
Klargester sewage system

Klargester sewage system

They don’t take much time off and are back on the Wednesday.  The piles of earth are smoothed out  – but more holes are dug for the Klargester package sewage system (the main sewer is too far away to allow an economic connection) and all the external drainage for both foul water and rain water are dug all round the slab.

The garage foundations are dug while the digger is still on hire.  These are, in almost everyone’s opinion, ridiculously deep.  Do you really need 1.5 m foundations for a car?  But it would seem that no structural engineer dares do anything else, in case it does, after all, move in some way.   We now wait for the frame.

A few days peace.

Posted in Klargester, Sewage | Comments Off on Week Three and Four

Week Two

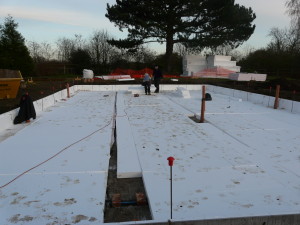
The earth between the foundations is scraped off.  A good deal of what was once garden is now a foot or two higher than it was.  Edging pieces—concrete L-shaped pieces internally lined with expanded polystyrene are fixed all round the outside edge. Inside, first a layer of Claymaster—a crushable polystyrene which will yield if the ground beneath should heave—is laid.  On top of this goes a 100mm layer of insulation—load-bearing polystyrene. 

Layers of insulation being layed

Insulation Layers

The picture shows the first layer of insulation covering the pink tinged Claymaster (there are some sheets over at the far back right).

Then the damp proof membrane, brought up all round the sides, followed by two more layers of insulation—so there are 300 mm in all.

Into this go clips to hold the metal grid of reinforcement and reinforcement bars bent and clipped in place.  On what will be the north side of the house, a plastic grid is laid which holds the pipe work of the under floor heating.  It’s been agreed that although theoretically UFH is not necessary, future purchasers of the house might be worried if there was no apparent conventional heating.  Placing the UFH near the bottom of the slab has two advantages—and one disadvantage.

Underfloor Heating being laid
Underfloor heating being laid

First the amount of heat that can usefully be stored is increased, so it acts as a thermal store in its own right.  Further, should we wish to bolt anything into the floor, there’s a good 3+ inches (75mm) before there’s any risk of puncturing a pipe.  The disadvantage is that the response time is slow – it’ll be while before any heating effect is noticeable in the house. The pipes are all continuous—there are no joints within the slab—and are brought out to a manifold which simply acts as a place to terminate the pipes—though it could be used to zone the heating if that’s found necessary.

Posted in Foundations, Underfloor heating | Comments Off on Week Two

Week One

After 18 month’s research, marking out finally starts.  It’s really pretty exciting—but also rather frightening.  I know what I want but have I been able to communicate that to the architect and builders?

Then excavating the foundations with a large digger. Concrete pump Amazing quantities of soil and clay appear and pile up.  These are spread out over the rest of what was once garden.  All the ducts are put in place—all the foul water drains, the duct for the air for the stove and those for bringing in water and electricity.  These are all brought up from underneath and will be sealed.  Holes in the walls of the house itself must be avoided as they are likely to compromise air-tightness.

Delivering concrete

Concrete Pump

The concrete pump appears and unfolds itself in a “war of the worlds” manner  arcing high over the trees. Concrete lorries arrive one after another, empty their loads into the hopper at the back of the concrete pump while, at the other end, the hose is guided along the trenches, partly by hand but mainly by radio controlled joystick .

Building an eco-house of any sort is an altruistic endeavour.  In other words, it’s going to cost you more than it would if you just built a house to modern standards.  (See separate section for this discussion – eventually!)

Posted in Foundations | Comments Off on Week One

Where we started

A little history:  A few years ago we started getting letters through the post from developers offering to buy our garden—we’d suddenly come within the planning envelope.

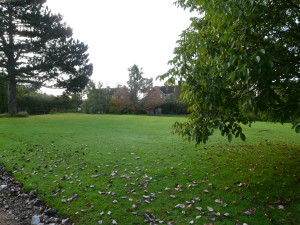
View to the south before the start

View to the south before the start

As the picture shows, there’s a patch of land beside our house which, we’re told, was once an orchard but the farmer let the pigs in—accidentally or deliberately is not recorded!  They de-barked the fruit trees, which died.  When we came here, 26 years ago, there were only two fruit trees left.  We’ve planted quite few more since.

But what to build?  A house? Several houses? Sell the land to one of the demanding developers?  But what would they build and would we like living next to it?  It seemed to us that a developer would probably try to build as many houses on the half acre as the local planners could be persuaded to approve—which might well be more than we would like.

What if we built just one house, set comfortably in the space, not encroaching on the old house at all, as the whole plot of land divides naturally into two parts?  We might not—indeed, we would not—make as much money but it would be far more satisfying, more satisfactory to do this. We could make it suitable for us, our retirement house.

There were some false starts as we tried to arrive at a layout which met our needs.  But then, in May 2010, I read an article in the paper about a house in Birmingham.  It was a zero carbon house, designed by architect John Christophers, and built for his own use.  It’s an adaptation of an early Victorian 2 bed semi into a 4 bedroom house—using only solar photovoltaic panels, solar thermal panels and a log burning stove.  I found it fascinating— inspirational—and started doing a lot of research on the internet to educate myself.  As a retired electrical and electronic engineer, I found the technologies involved not too difficult to understand.  But being an engineer doesn’t make you an architect.  Nor does it make you a builder.  Who could I find to build this house?  Given my limited resources—my savings—this wasn’t going to be a grand design.  Far from it, it was going to have to be Modest Design!

Posted in The project history | Comments Off on Where we started

At the beginning

So we’ve decided to build a new house, a zero carbon house.  (See what I mean by this  in the separate section).  If we have to build ourselves a house, then let’s make it a bit different.  After several false starts, exploring different shapes for a house, in May 2010 I read, entirely by chance, the report of a zero carbon house in suburban Birmingham.  This had solar thermal panels, solar photovoltaic panels and a log burning stove.  And that, in a sense, was all.  Magic.  That it was a huge transformation of an early Victorian 2-bedroom semi into a architect’s 4 bedroom show-house with all sorts of innovative walls and floors was interesting – impressive – but not the point.

It started me searching and researching on the internet, educating myself about insulation and airtightness, about solar panels and solar gain, thermal stores and thermal mass and mechanical heat recovery ventilation systems.

And then another chance event, of serendipity, occured.  A friend told me about Uttlesford District Council’s Sustainable Homes network.  This hadn’t appeared in my searches over the previous seven months.  This gave me the names of local people, including an architect and a builder who knew about this sort of building and, even better, was already doing this sort of thing.

By this time we had a reasonable idea of what we wanted.  If this was to be our retirement house, it would make sense to put one bedroom downstairs, with its own bathroom and of course kitchen, dining/living room and sitting room.  Large utility room as you need room to handle honey as we’d no intention of giving up the bees.  And there would have to be lobbies to each outside door as you don’t want to let all the warm air out of the house when you open the doors – there have to be back and front halls to act as air locks.  These halls have to be as small as possible – to minimise the heat lost – but large enough to be sensible.  The ergonomics of the space have to be thought about. There must be room to come in, put down whatever you might be carrying, shut the door behind you, possibly take your coat off, and only then open the door into the rest of the house.  More space.  The house – or at least the ground floor is getting quite large.

Posted in The project history, Zero Carbon House | Comments Off on At the beginning